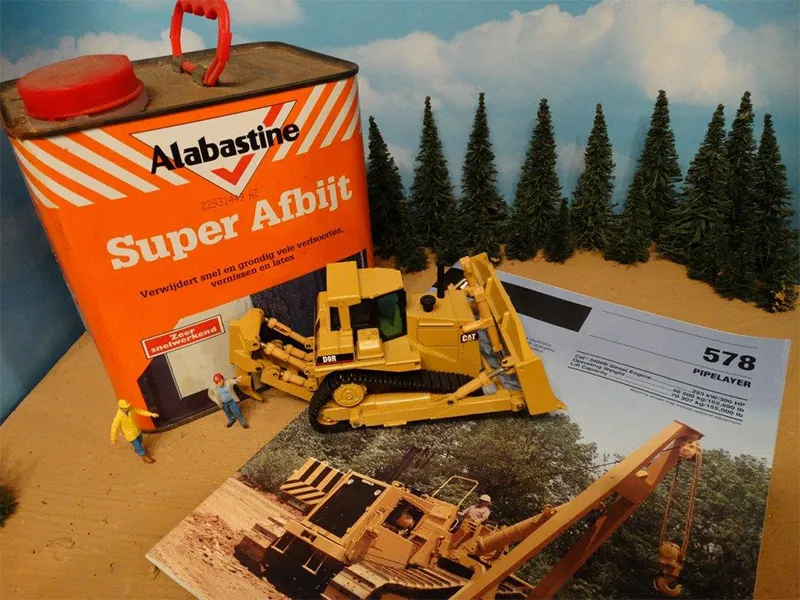
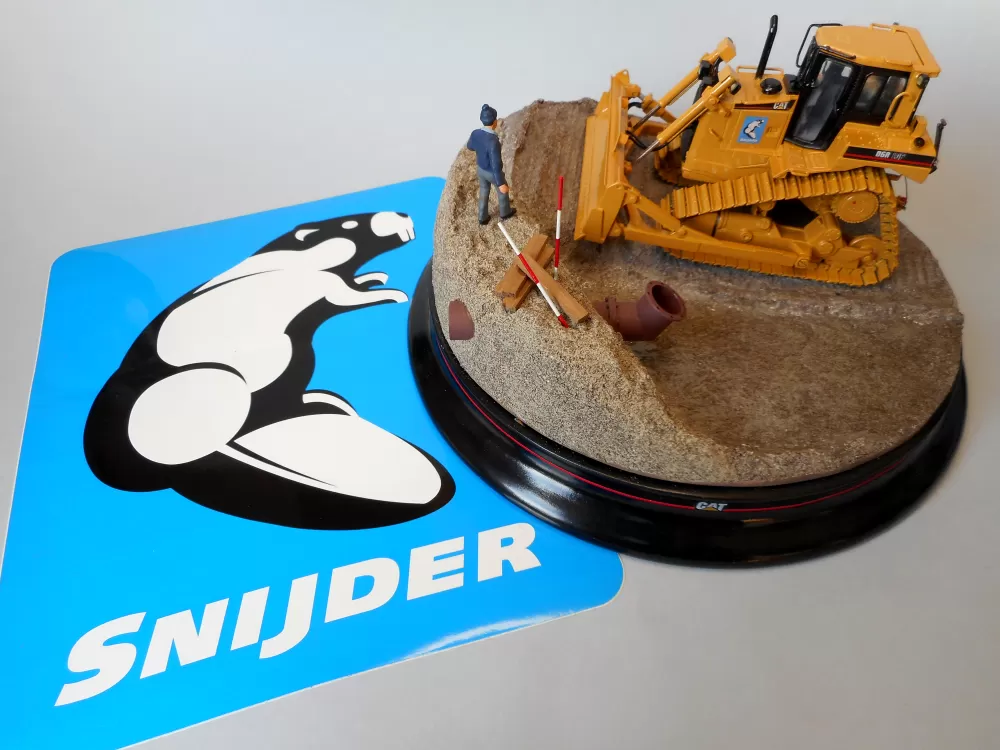
Custom scale model builder Gertjan Veld has recently started his next project of building a
- Caterpillar 578 Pipelayer
The Caterpillar 578 Pipelayer was produced between 1989 and 1997. The Caterpillar 578 series machines had a #8HB serial number prefix.
Specification highlights: :
- Caterpillar 3406B diesel Engine
- Net Power: 223 kW
- Operating Weight: 102.690lb
- Counterweight: 25.963lb
- SAE Ground clearance: 17.8"
- Travel Speed: Forwards: 2.35-6.7mph and Reverse: 2.9-8.6km/h
- Lift Capacity: 155.000lb up till 48"pipe
It is our goal for the coming period in this "Making-of Caterpillar 578 Pipelayer" to show how this custom model will be achieved.
Gertjan shares his building skills through the photos with little notes guiding us in the construction process. Gradually it shows the making of a unique model by using the Caterpillar D9R Track-Type Tractor from NZG and a white metal boom kit made by HIMOBO in 1:50th scale to create his Caterpillar 578 Pipelayer.
Enjoy reading & watching!
Gertjan and Wouter
The Kickoff
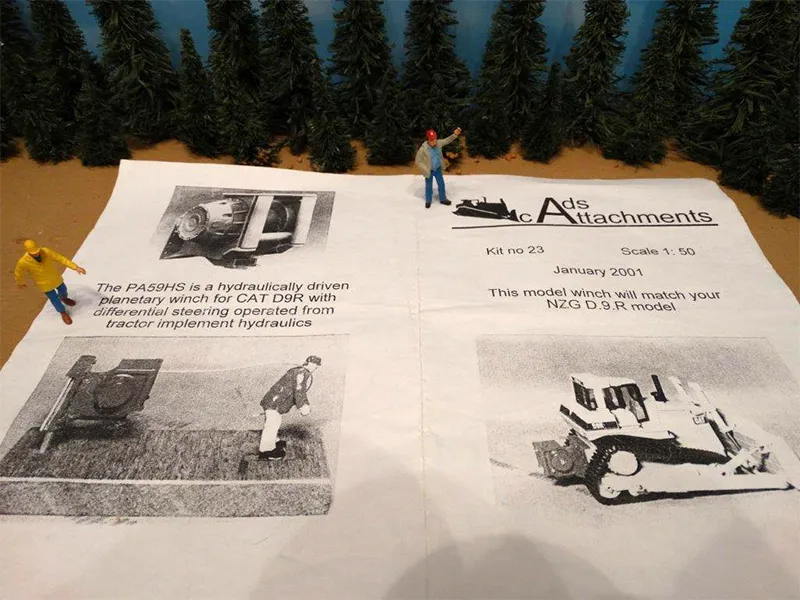
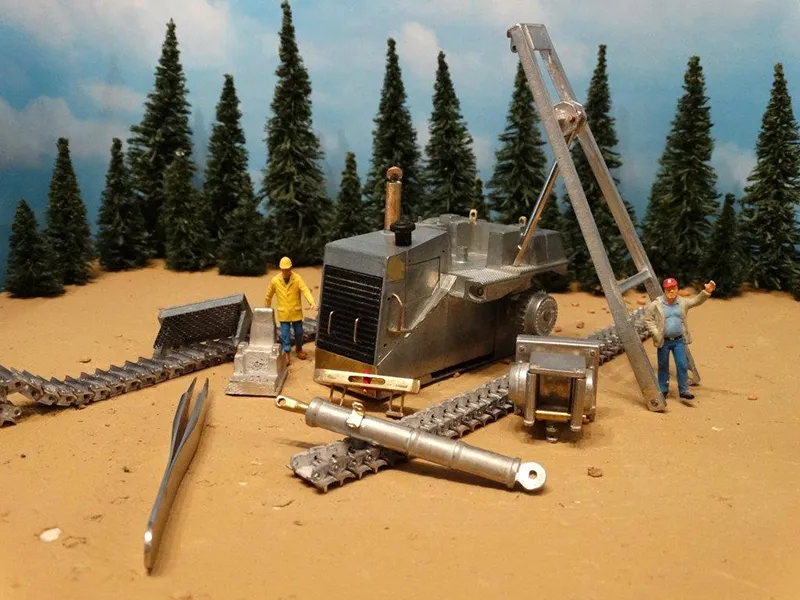
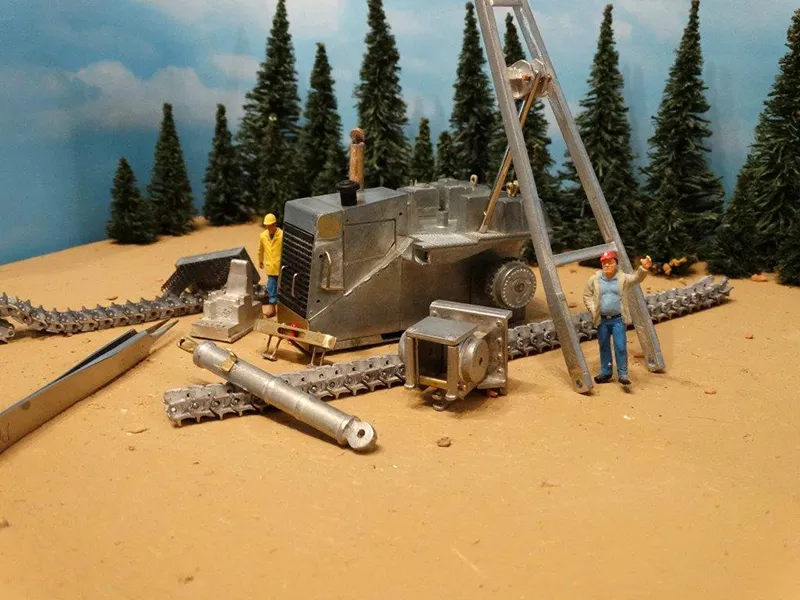
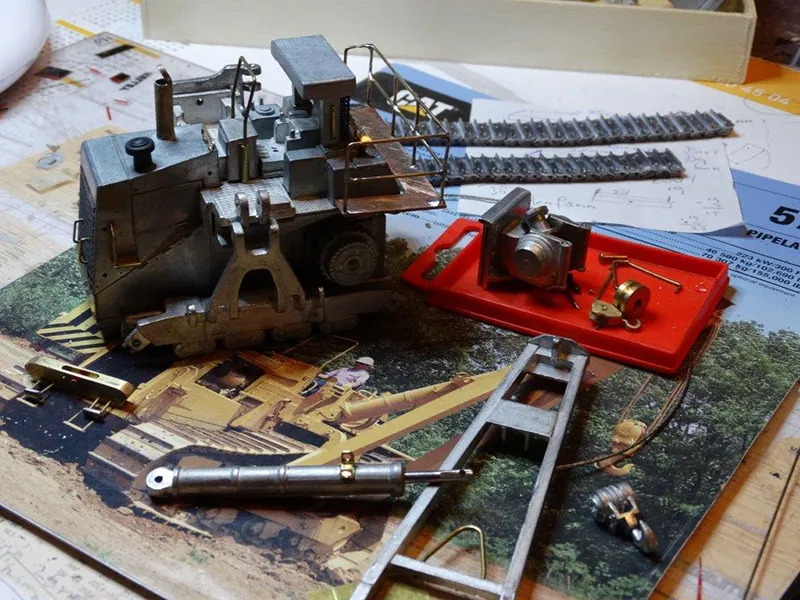
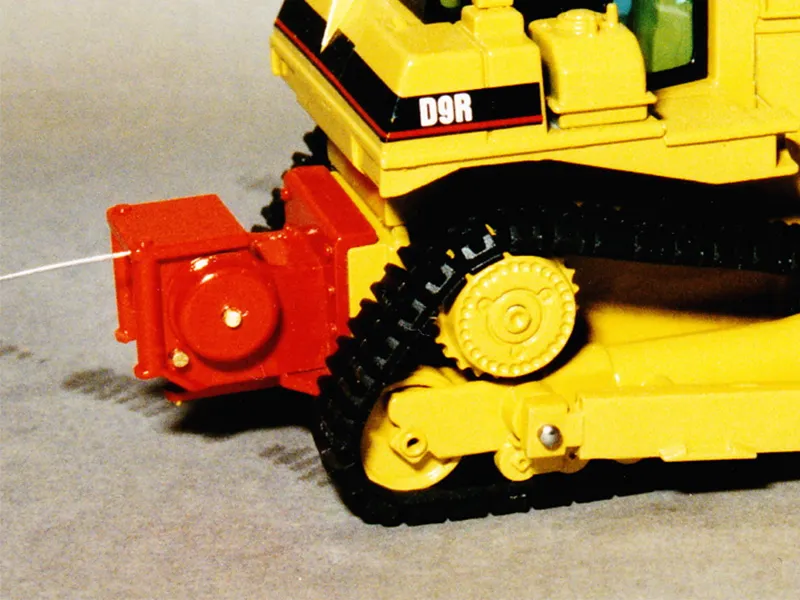
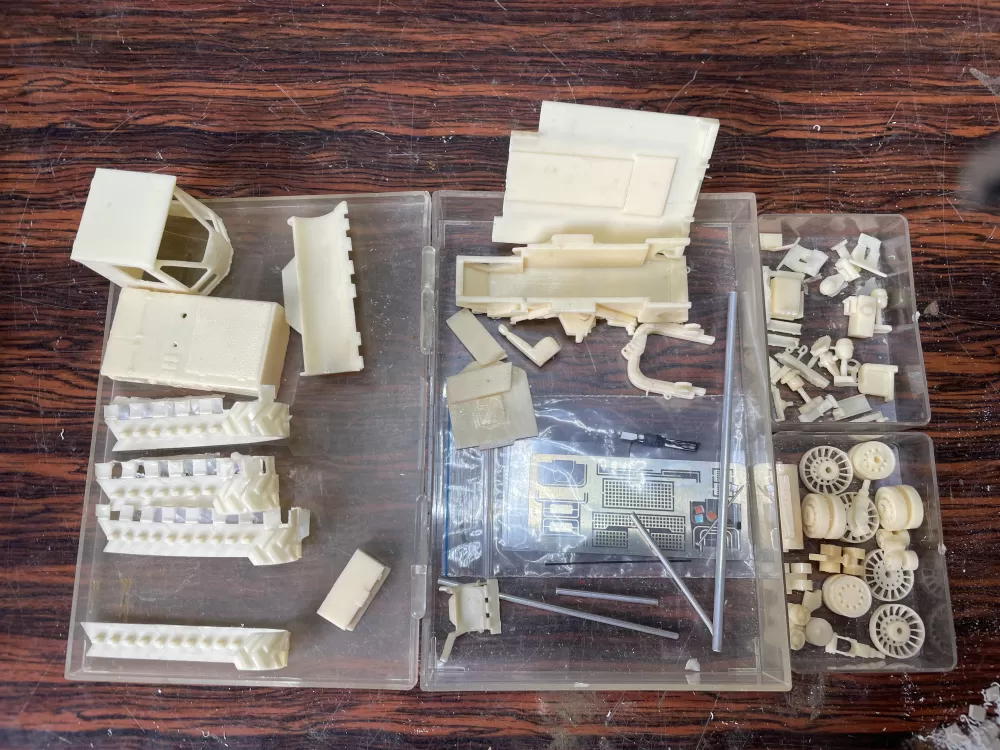
As a base for this project Gertjan uses the Caterpillar D9R Track-Type Tractor from NZG and two white metal/ brass kits from the Caterpillar 578 Boom made by HIMOBO and the rear winch kit #23 made in 2001 by cADSttachments in 1:50th scale which were purchased by Gertjan of Norbert Mietz - Modellspielwaren Mietz (msw-modelle.de), a German scale modelshop on the NAMAC swapmeeting at Houten, The Netherlands.
Work to be done! All components of the two kits are checked and, if necessary, deburred of casting scrap with the help of a file and soft sandpaper. Where necessary in both kits Gertjan also slightly reamed the holes so later everything fits better and can be easylier assembled.
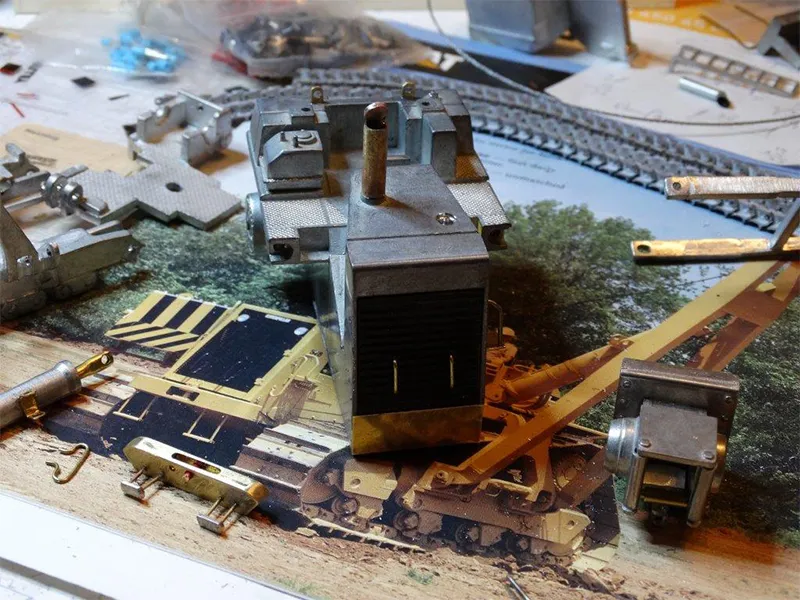
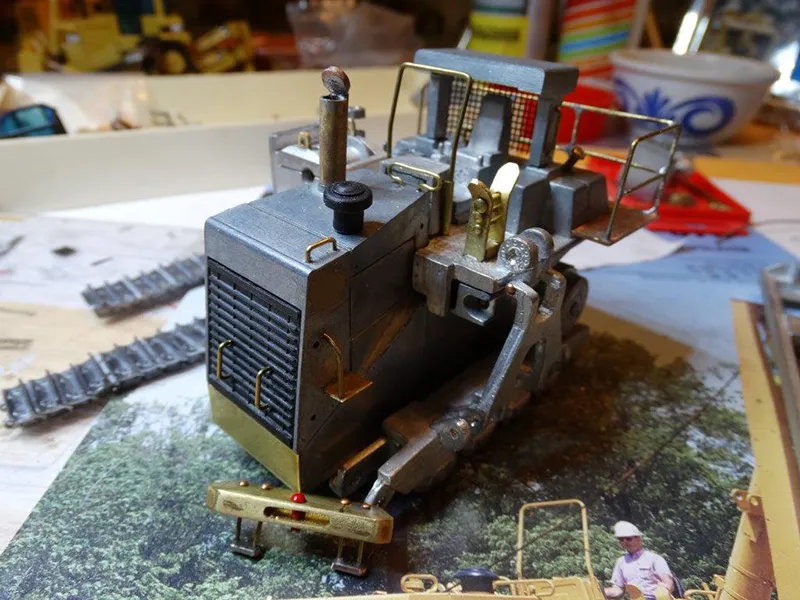
Gertjan has started the necessary modifications to the body of the donor Track-type Tractor. He has, where necessary, drilled holes of 0.8mm which serve later for the fixation of the handles and handgrips. Both are bent of 0.8 mm brass.
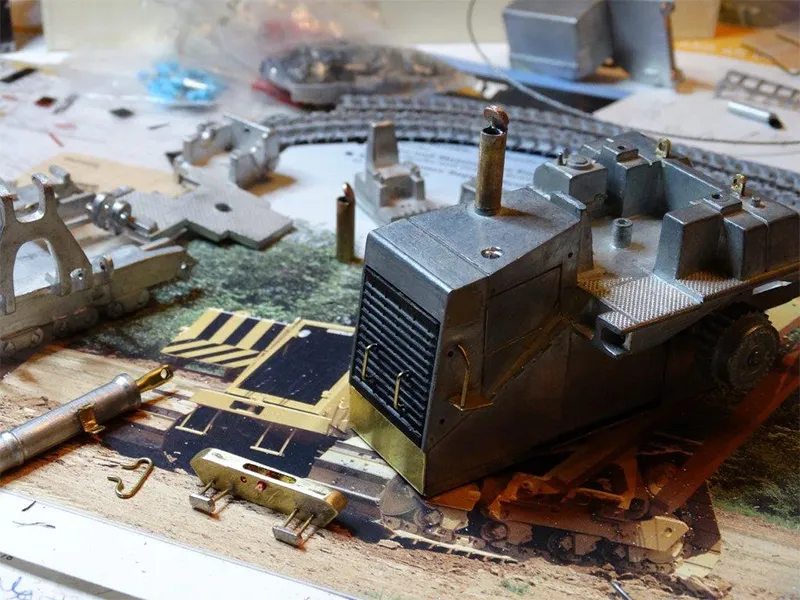
To imitate the Caterpillar 578 Pipelayer as accurately as possible Gertjan has chosen to replace the plastic tracks that are included on the donor Caterpillar D9R NZG by metal tracks that he had casted by a friend in Germany.
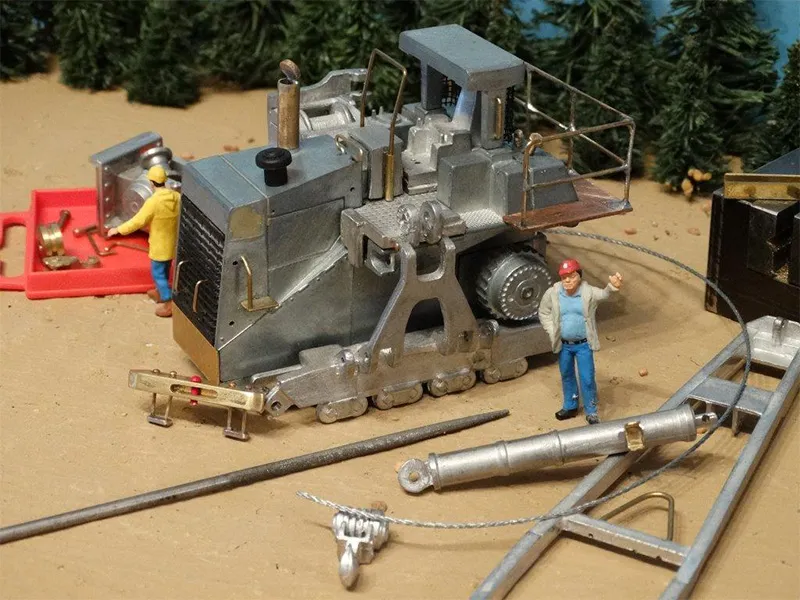
During this project, Gertjan besides the two kits that he used to build his Caterpillar 578 Pipelayer, again made from scratch the necessary additional details to make this another unique custom scale model.
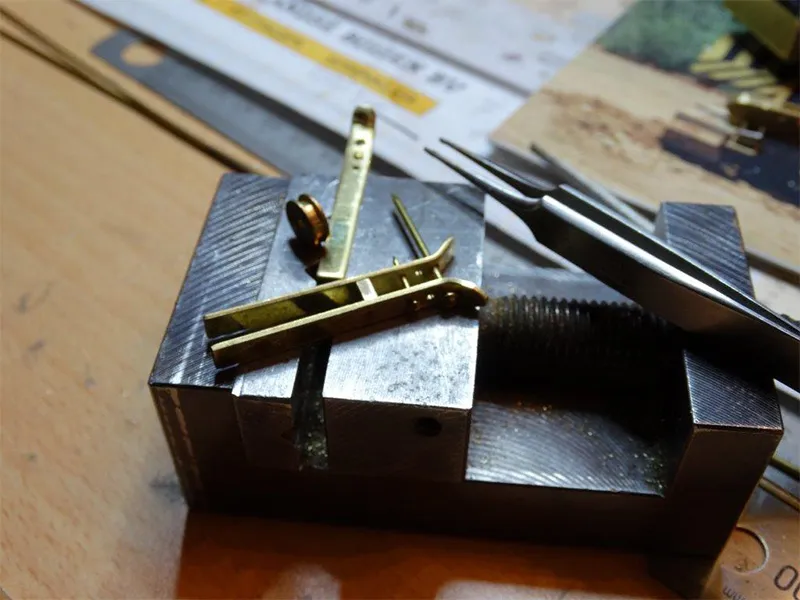
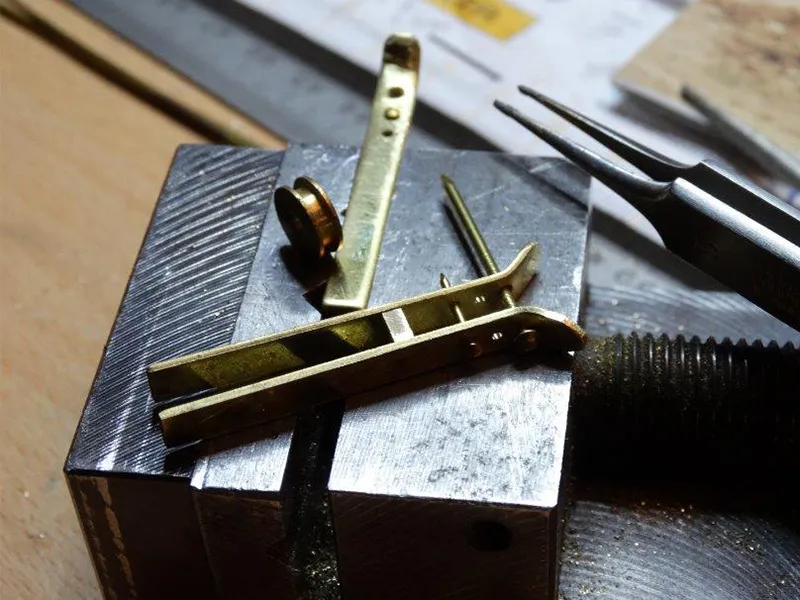
A few examples include the new exhaust, the front bumper and the catwalk which he has completely scratch manufactured from brass material. During this "Making of ..." they will all pass in review.
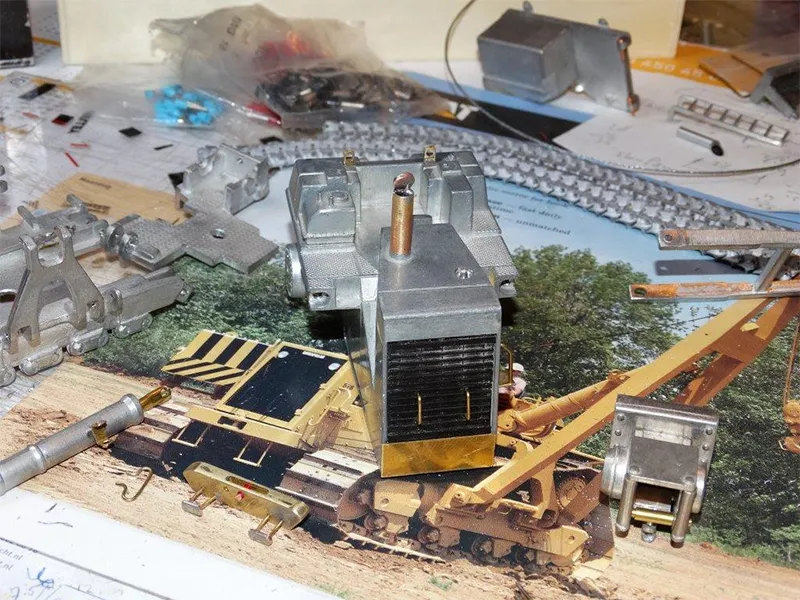
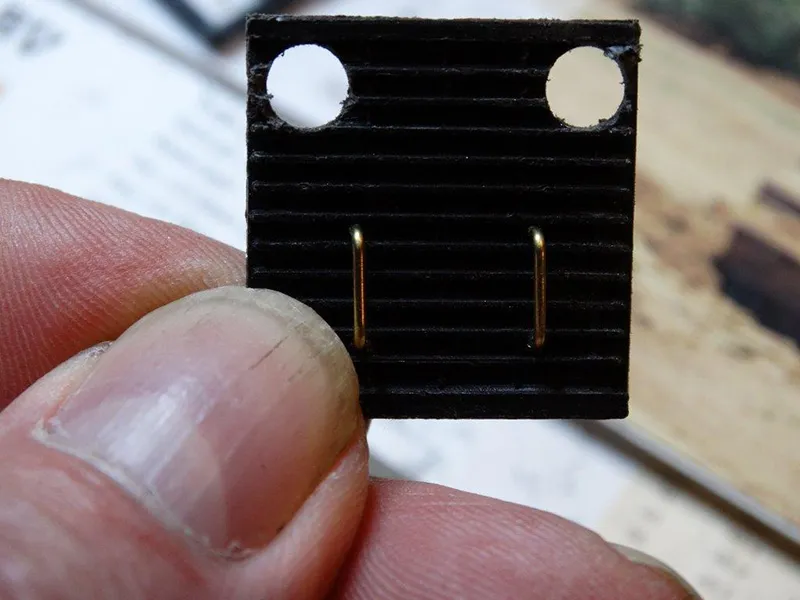
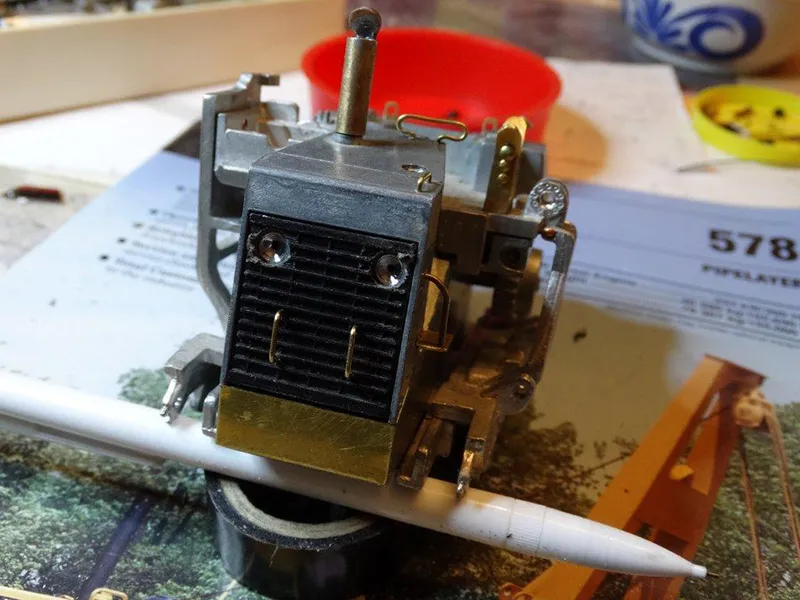
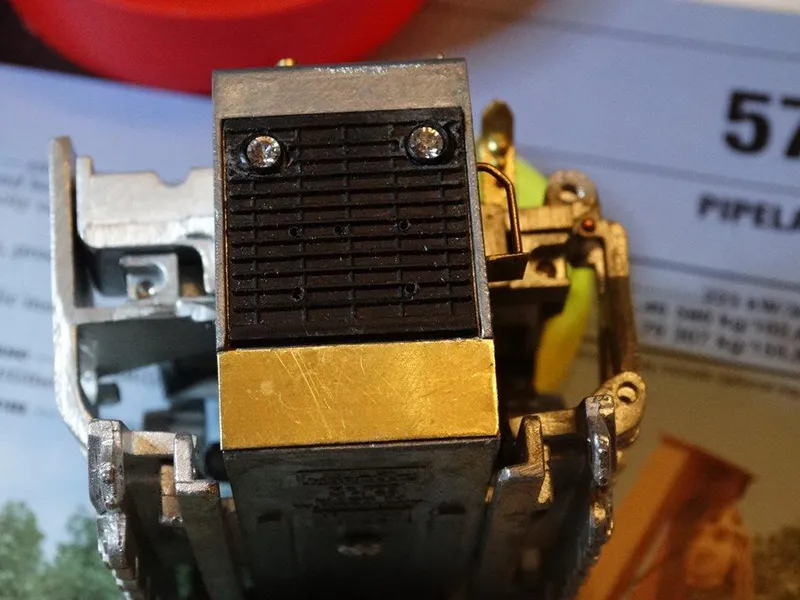
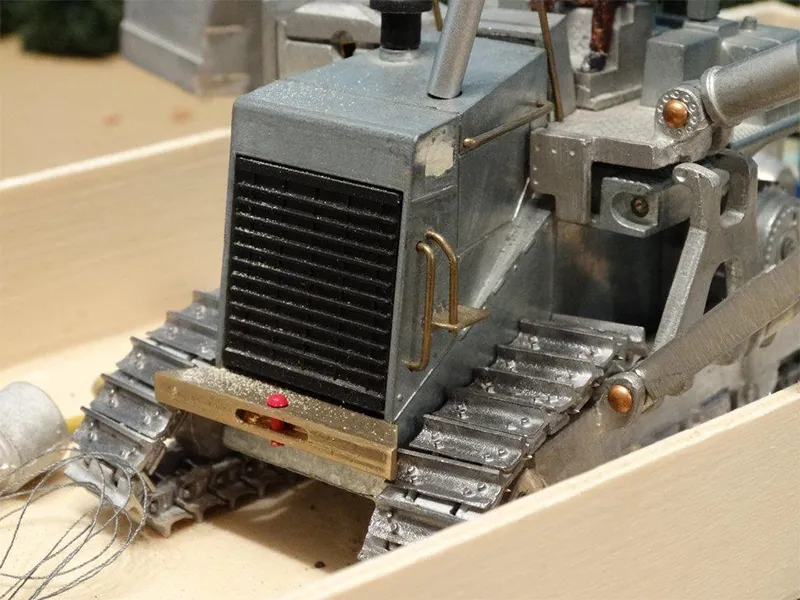
The grill
On the grill is put a brass plate on the underside so that the holes disappear and a smooth surface arises so at a later stage during our "Making of ..." the newly created bumper can be glued to.
The grill is not only provided with two handles as well as two round headlights are recessed fitted in the grill. All in all a difficult job for the grill is made of a relatively soft plastic material. The holes are drilled 50mm so that the headlights with their holders after assembly are perfectly integrated into the grill.
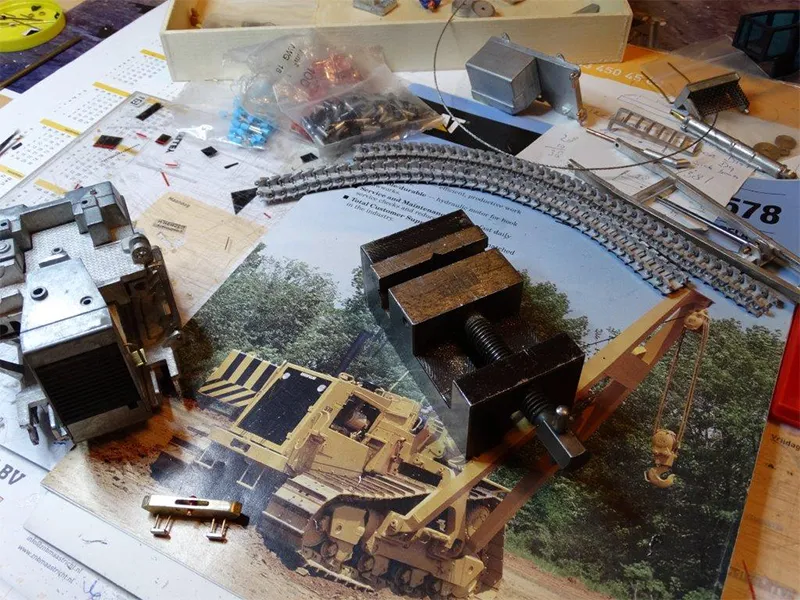
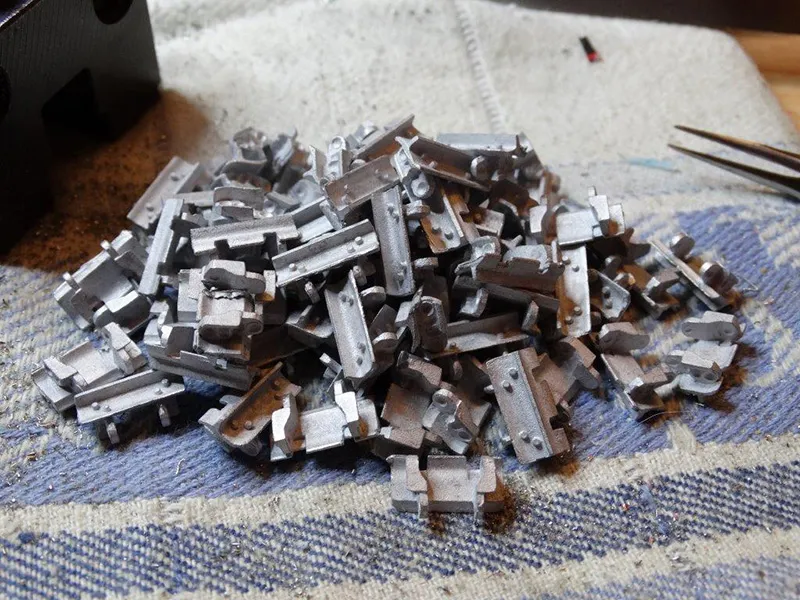
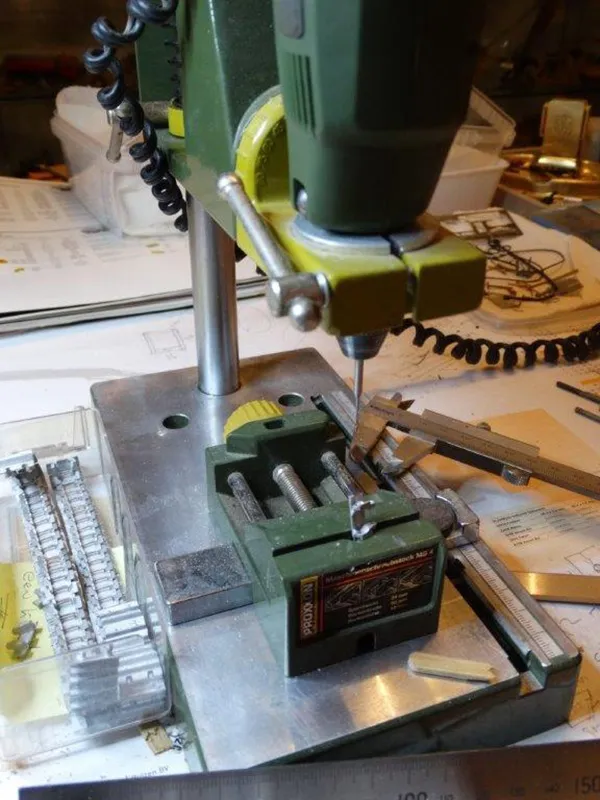
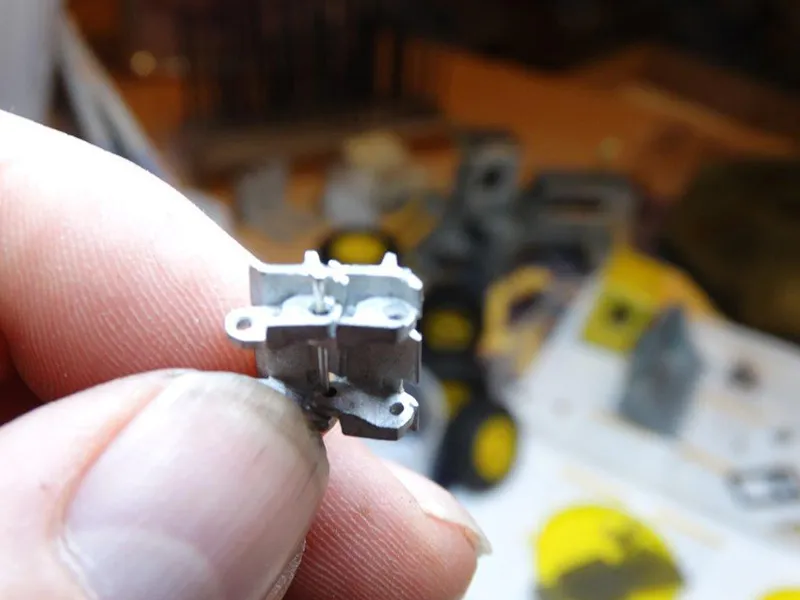
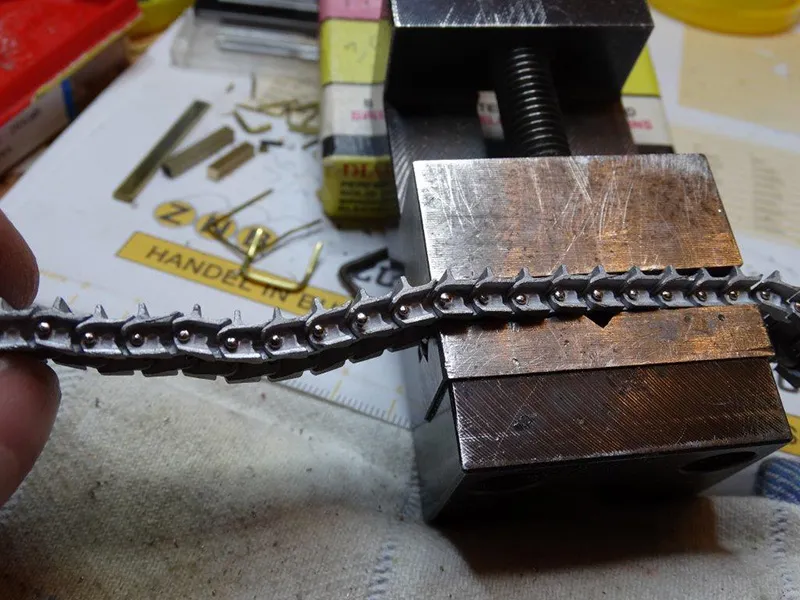
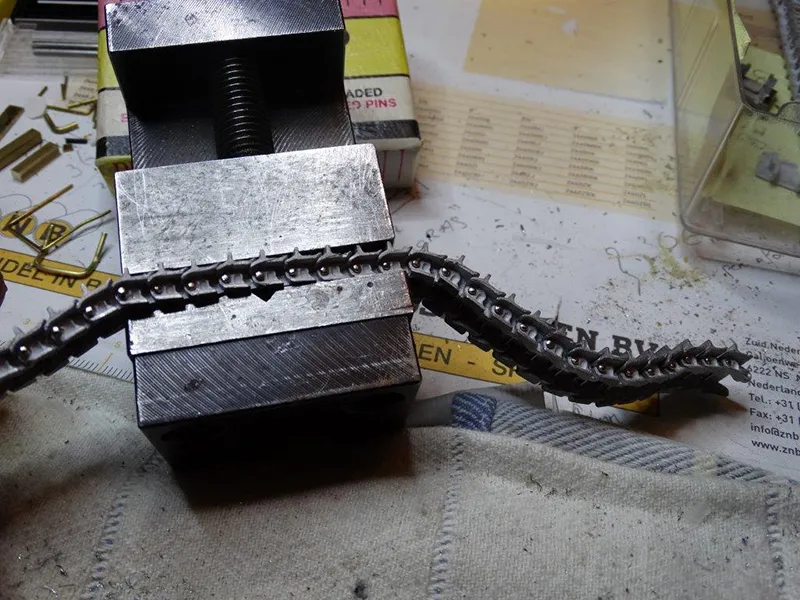
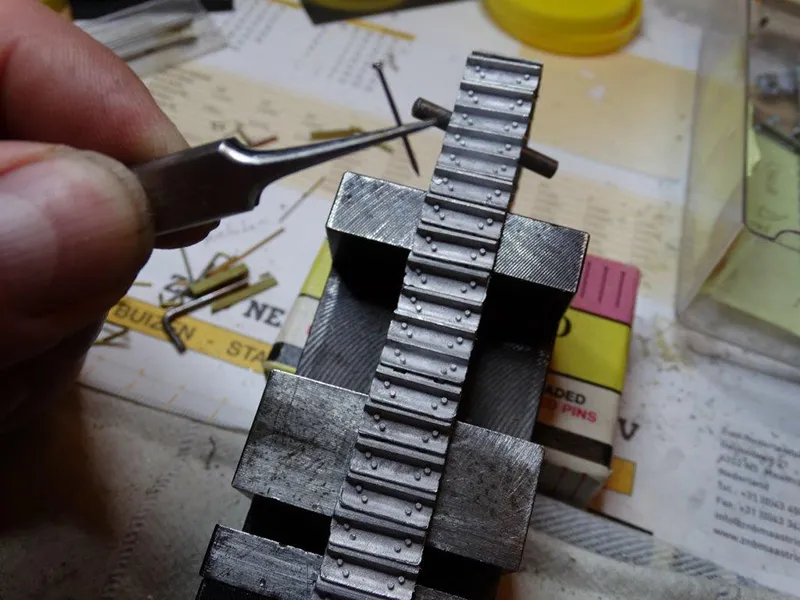
The shoes
The plastic tracks of the Caterpillar D9R Track-Type Tractor from NZG will be replaced through metal tracks who let Gertjan produce in-house.
The individual track shoes do require quite some work before they are suitable to be placed as the metal tracks for his Caterpillar 578 Pipelayer.
The first step is the deburring of any loose track shoe. The second step is the drilling out of all the holes that are required to connect the plates after the operations with a pin to each other. The third step is to snap the individual plates in each other and then connecting them with each other with the pin. The fourth and final step is to keep connecting track shoes until they have reached the proper length for the undercarriage of our Pipelayer.
TIP: To achieve that the metal shoes in the final phase are sprayed properly it is useful to temporarily connect start and end of the shoes together and to hang the "metal tracks chain" around an object, like a piece of broomstick. Then you can easily rotate the shaft while you're spraying and therefore you do not need to touch the shoes themselves.
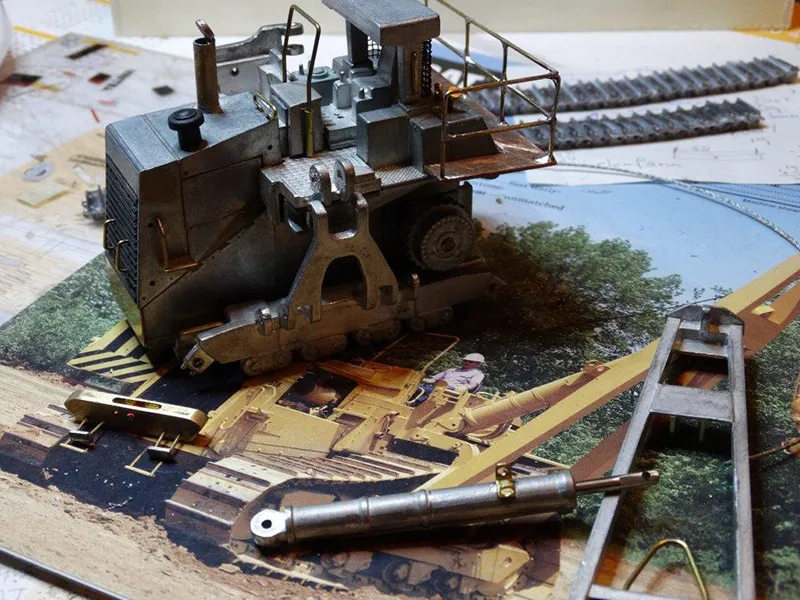
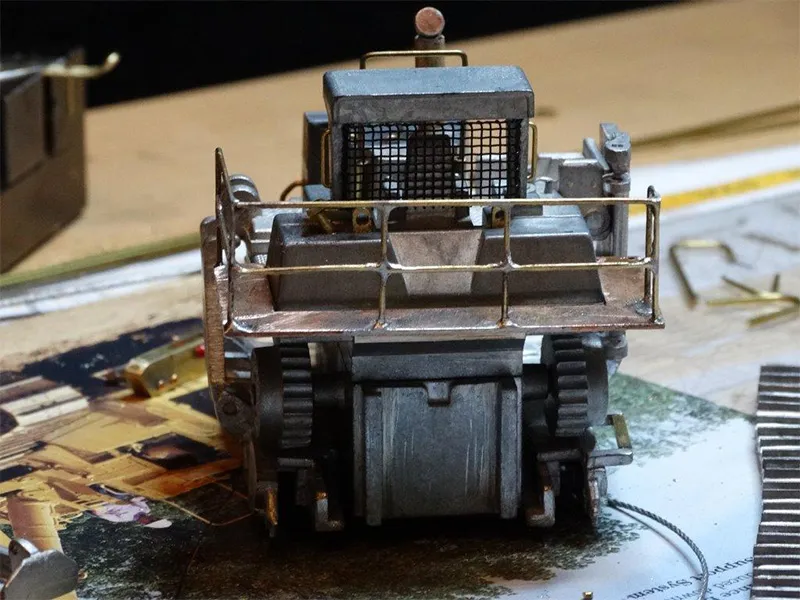
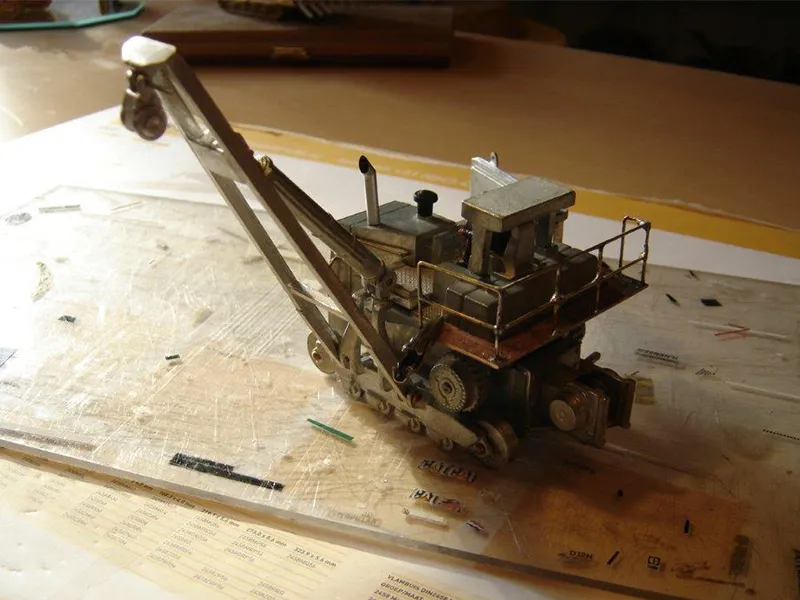
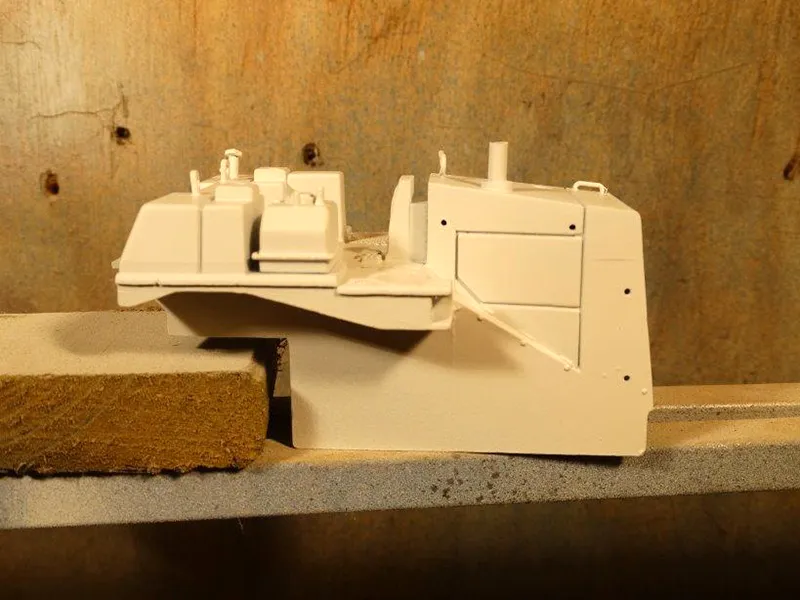
The cabin and superstructure
In the platform are holes drilled for the mounting of the working lights. The filler cap on the fuel tank and a pair of lifting eyes are provided as well.
The operator's seat is adjusted and equipped with the necessary sticks to control the boom and winch.
The back of the cabin canopy is equipped with a protective composite of square wire. The catwalk is entirely tailored made from scratch from brass material and then soldered.
The superstructure is completed by attaching graps and handles made from brass and an extra safety bar at the front of the Control Panel to protect the operator of the Pipelayer if it unexpected would tilt.
The lift cylinder of the boom of the Pipelayer yet been adapted, and provided with a brass U bracket which serves to secure the boom in transport position.
Op de bovenbouw wordt ter hoogte van het draaipunt van de hydraulische hefcilinder die de giek beweegt een steuntpunt gemaakt uit messing materiaal waarop al het lier- en kabelwerk wordt opgehangen als de Pijpenlegger voor transport is ontdaan van de giek.
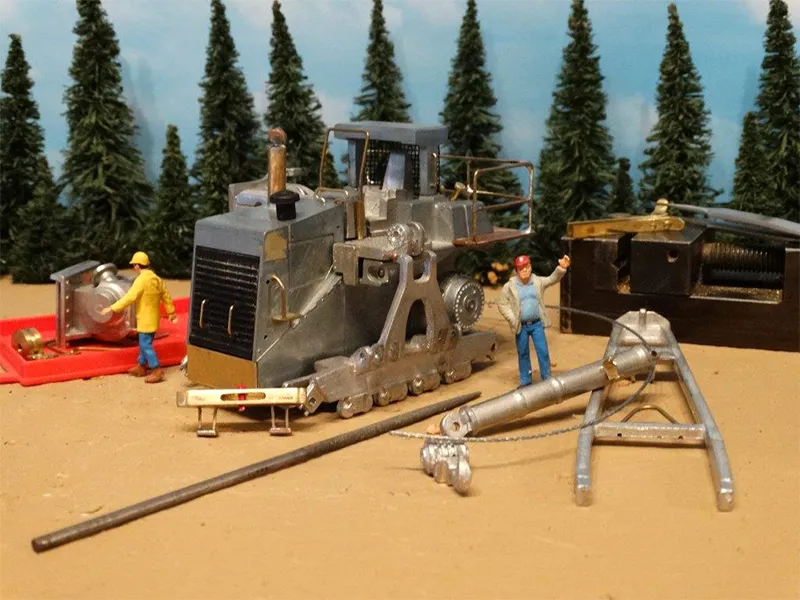
The winch
The Caterpillar 578 Pipelayer is equipped with a winch. Gertjan for his model makes use of the winch kit which was formerly released by cADSttachments. Interested? There is still a limited number of sets of this kit #AGM23 available through Buffalo Road Imports in the USA.
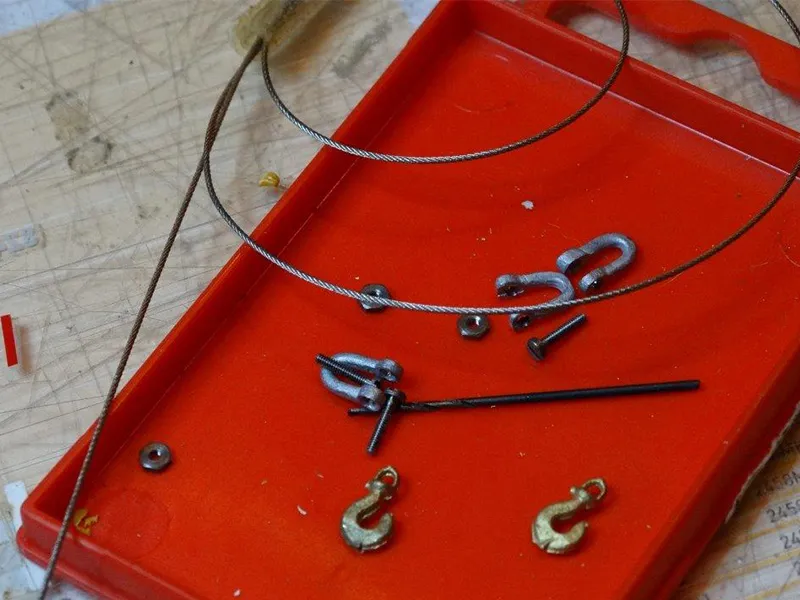
The winch is of course equipped with a steel cable and hook.
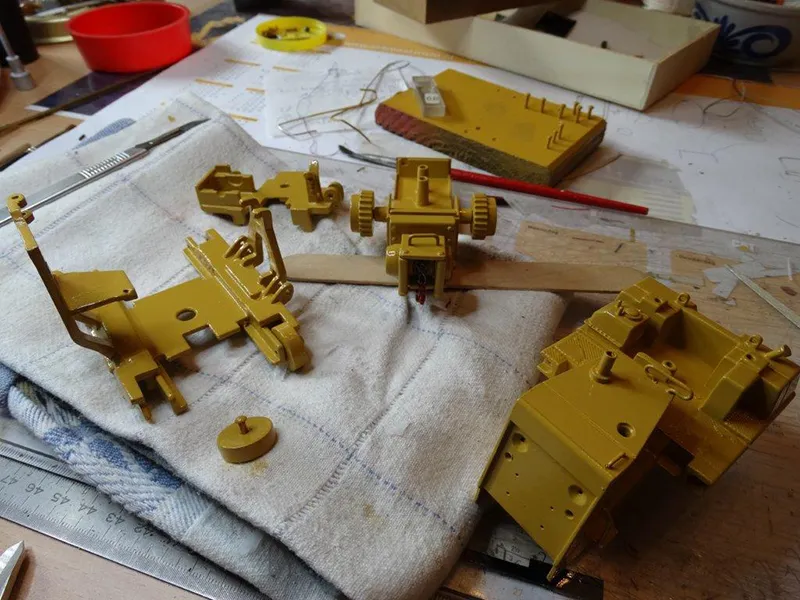
The Details
In the build up phase, the last unevenness are eliminated and the unwanted holes of the non-existent lift cylinders to the side of the front engine close plastered.
The parts are now checked again and if necessary get their final adjustment yet so everything fits. All the compounds are provided with brass rivets of different diameters.
The final step of the construction phase is after the trial fit all the elements once again clean all the parts with some lukewarm water and a little ammonia added for degreasing.
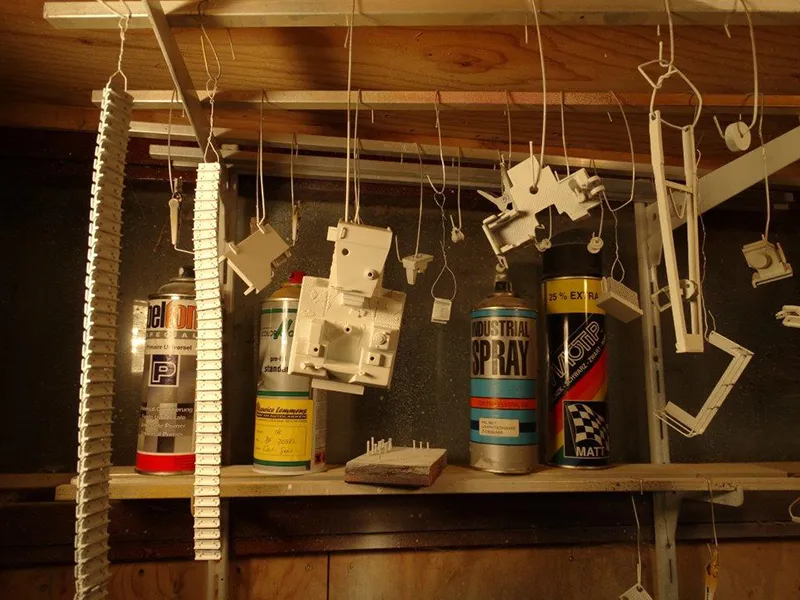
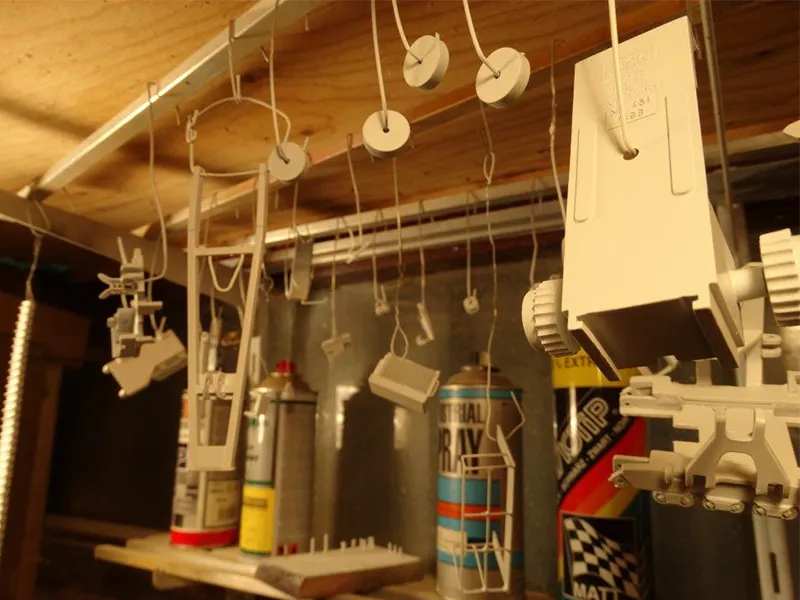
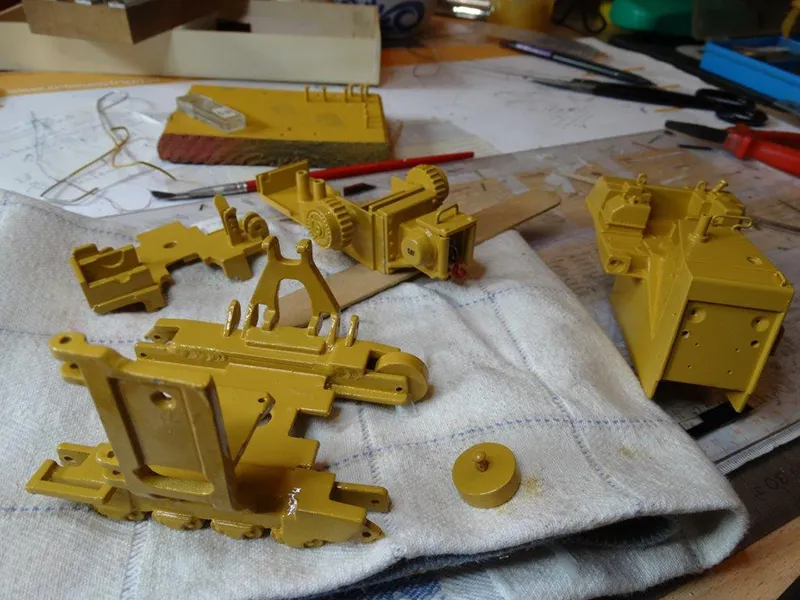
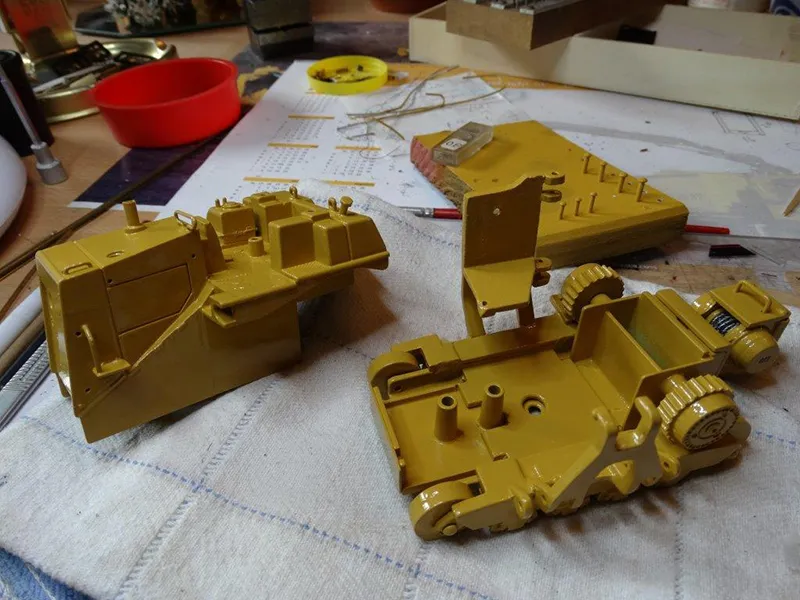
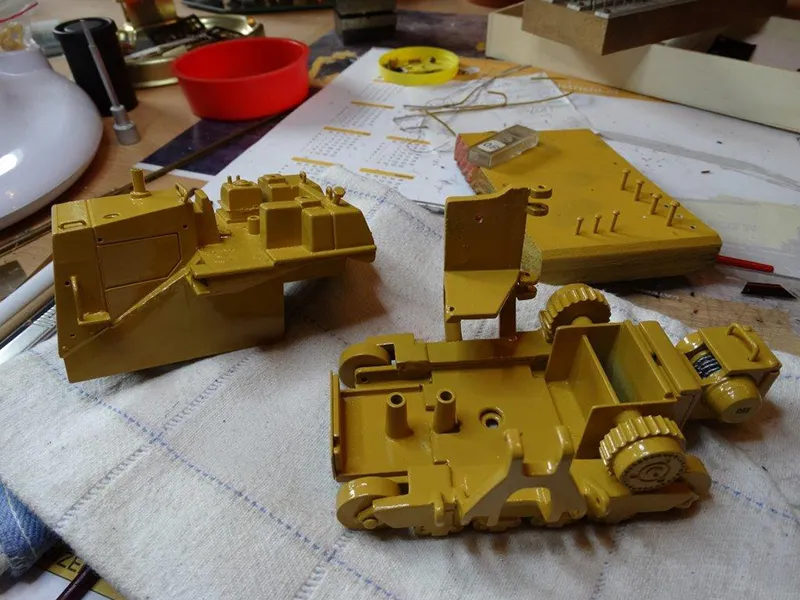
The painting of the parts
After thoroughly cleaning with some lukewarm water with a little ammonia for degreasing let all parts, preferably at room temperature or even warmer dry. If necessary, place all parts briefly on a rack above the heating so the spray primer and paint adhere well directly on the resin or metal parts.
All parts, one by one are carefully hang in the spray cabin.
As a priming coat all parts are first put in the spray primer. Often this is a gray primer or a gray primer in which already has been added and mixed some drops of yellow paint to create the perfect ground layer to spray on your final color.
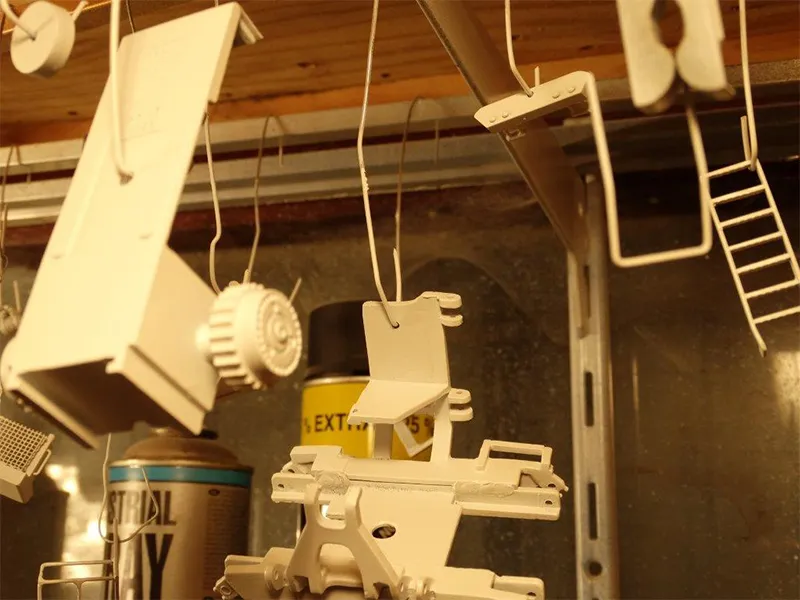
After applying the primer ample time to let out enough to harden all painted parts before starting the finishing with the final Caterpillar top coating.
Then follows the same ritual: cleaning, degreasing, preheating, hang up, final coating and allow to harden.
After spraying of the parts in the final paint layer, in this case, of course in original Caterpillar yellow, take enough time in order to let all parts under ideal conditions dry and harden. So keep your freshly painted parts free from dust under a dome or a keep them in a fully enclosed space. Preferably not in a cold hobby barn, but at a slightly warm room temperature to achieve the best adhesion of the paint.
So how difficult it might be, Do not touch! Do not waste all your work if you start to quick with the final assembly. Please kind in mind that how great the temptation is: Hands off!
To be continued...