Custom scale model builder Thomas Wilk has again finished a unique project by building especially for the Modelshow Europe 2016:
- Caterpillar D6K Welding Tack Rig
It is our goal in this Making-of Caterpillar D6K Welding Tack Rig to show how this custom model is been achieved.
Thomas Wilk, shares his building skills through the photos with little notes guiding us in the construction process. Gradually it shows the making of a unique model by using as donor model the Caterpillar D6K Track-Type Tractor made by Norscot in 1:50th scale to create this one of a kind Caterpillar D6K Welding Tack Rig and added (as he always does -)) tons of extra details including some scratch built features. But even that was not enough: He made a unique diorama which is a small masterpiece on its own. As you will see it turned into a true museum piece and a very valuable and unique addition to his Caterpillar collection!
Enjoy reading & watching!
Thomas and Wouter
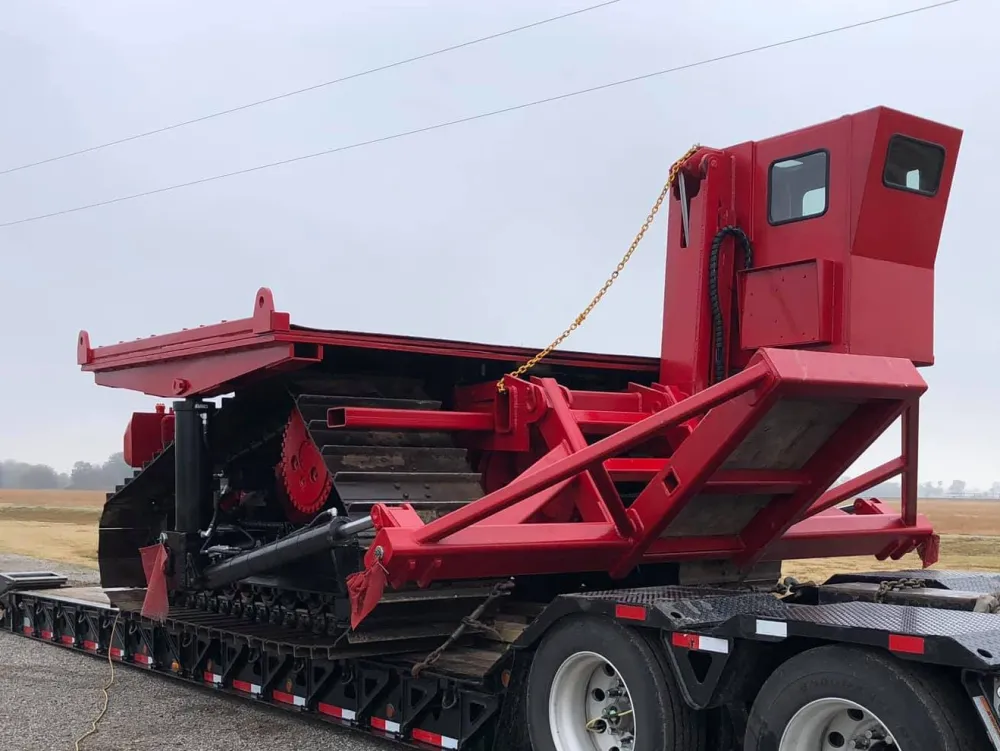
De Welding Tack Rig
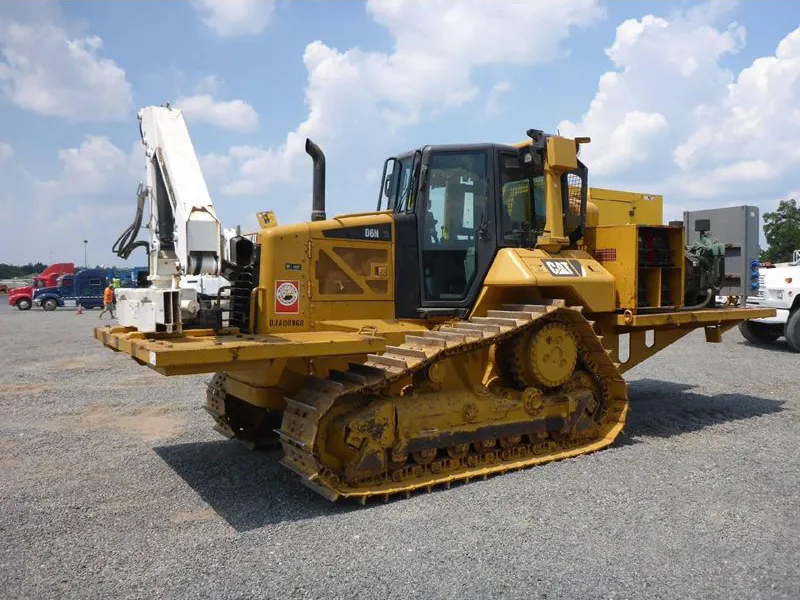
The Welding tractor is a small plant on tracks for the pipeline industry.The machine supplies the welders with everything they need on a pipeline project site: direct current D.C. or alternating current A.C., Welding power and Air pressure.
In the past was often the power source the main engine from the tractor to deliver the required welding energy. So the engine did run the hole day at high rpm without moving hardly any meter in the field.
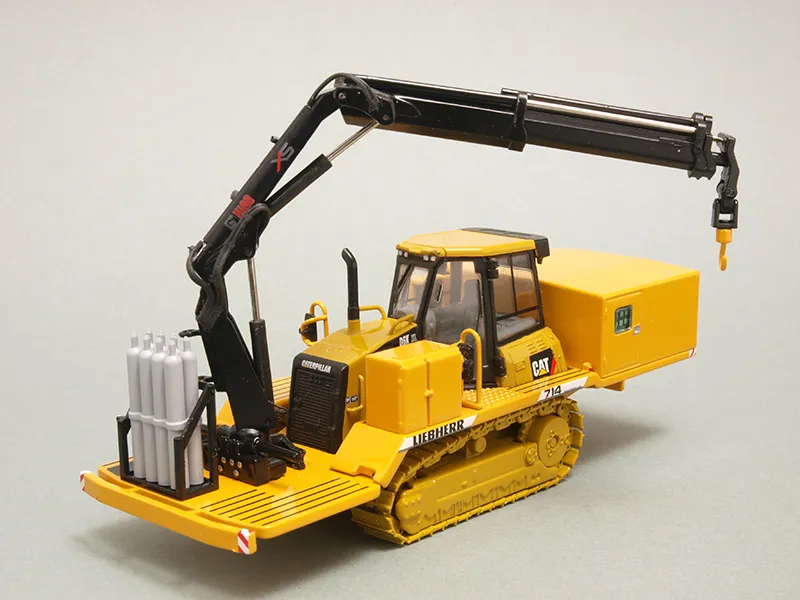
Today its more customary extra generator sets are used to handle this job. Often mount in the back of the machine as a natural counterweight to the front mounted Hydraulic Load crane. The Load Crane handles the shield gas or propane batteries and the welding tent to create a protected workspace for the welders without any influence from the weather outside.
Each machine is more or less individual build of the request of the customers and welding teams, depending on which welding process are used. By the welding rod process, no shield gas bottles are required, only some propane bottles to head up the welding joint. Today comes more and more the shield gas welding process into the field with an automatic sleet welding torch that runs on a support track around the welding joint / tube. To protect the welding seam from the oxidation with air, the welders need a covering of the joint with shield gas. That's the reason why more and more big welding tents are used.
Only a small air draught could destroy all the quality in the welding joint. The joint looks like as a Swiss cheese with thousands of small holes. So anybody knows this joint is not the toughest and also not sealed for a pumped medium into a pipeline. A lot of extra work must the grinder do to grind out all the failures and the work start again. Most of the joints are multiply layers of seams. Starts with the root joint, its the most critical joint on a welding joint. After comes the multiply layers of filling joints 2 - x and last but not least the final top layer.
The kick-of: "Swiss made"
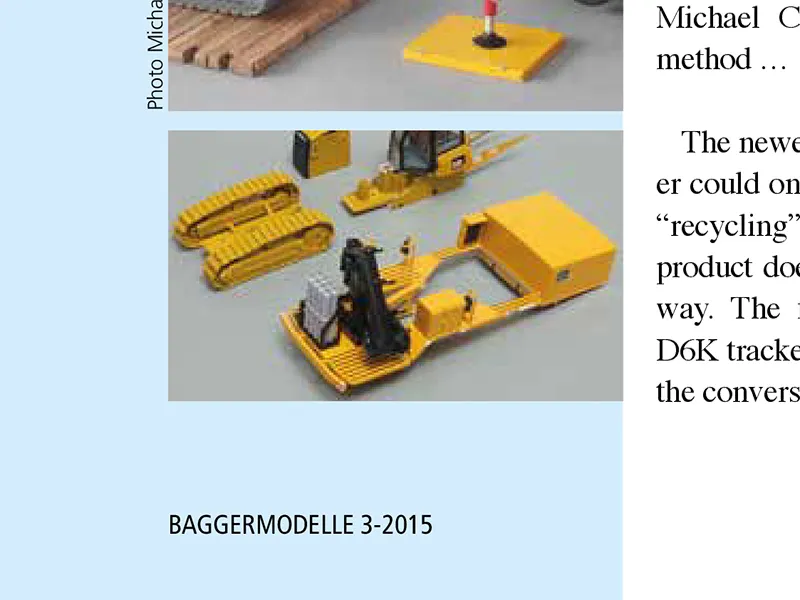
With permission from Daniel Wietlisbach (thanks!) I'm now able to share on my website the original article made by Urs Peyer that was published in BAGGERMODELLE 3-2015. THE opportunity for those who missed the magazine to see his custom project is achieved and the change to recreate your own copy of this unique model.
BAGGERMODELLE is THE full color magazine for collectors of construction machine models, cranes and heavy haulage. The magazine is writen in German. Detailed English translations of the main sections and features for every issue are available on the website and now also available as App or Android for your computer or mobile.
A MUST HAVE for every collector and fan of (custom built) construction scale models.
Op basis van het schaalmodel van de Caterpillar D6K XL Rupsdozer van Norscot in schaal 1:50 realiseerde custom bouwer en vriend Urs Peyer voor Thomas de Caterpillar D6K Lastractor.
We delen met hoe Urs Peyer te werk ging en de omzetting en de benodigde aanpassingen naar de Caterpillar D6K Lastractor heeft gerealiseerd die vervolgens weer diende als startpunt van Thomas.
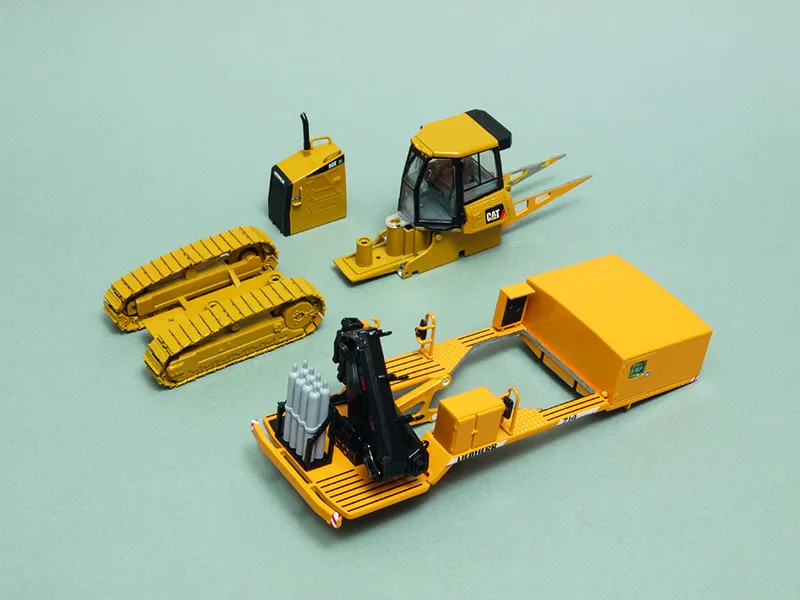
Door Caterpillar is tot op heden nog geen schaalmodel van een Lastractor uitgebracht. Om dit gat op te vullen maakte Urs dus dankbaar gebruik van de Liebherr SR 714 “Schweißraupe” oftewel Lastractor in schaal 1:50 die door NZG onder artikelnummer #855 is uitgebracht. Van het Liebherr donor schaalmodel wordt de achterste structuur met de lasgeneratoren en lasapparatuur omgezet en van de voorzijde worden de Hiab kraan, de gasflessenbatterijen en de twee looppaden links en rechts van de trekker gebruikt. Urs gebruikte voor deze metamorfose ABS buis: buitenkant ? 3.0 binnenkant ? 2.0 mm en ABS profielen: 3.0 x 1.0 mm.
Let's get started!
The Disassembly
The Caterpillar dozer can be broken down into four parts quite easily by the removal of four screws. The blade with pushing frame and hydraulic cylinder is attached to the frame with four bolts. These can be pulled out very carefully with a side cutter. The four bolts on the ripping attachment have to be drilled and pulled out.
Next, the four support brackets for it are sawn off flush with the frame and filed smooth. In place of the ripping attachment the “half-timber” brackets, filed smooth, are glued to the rear as shown in picture 2.
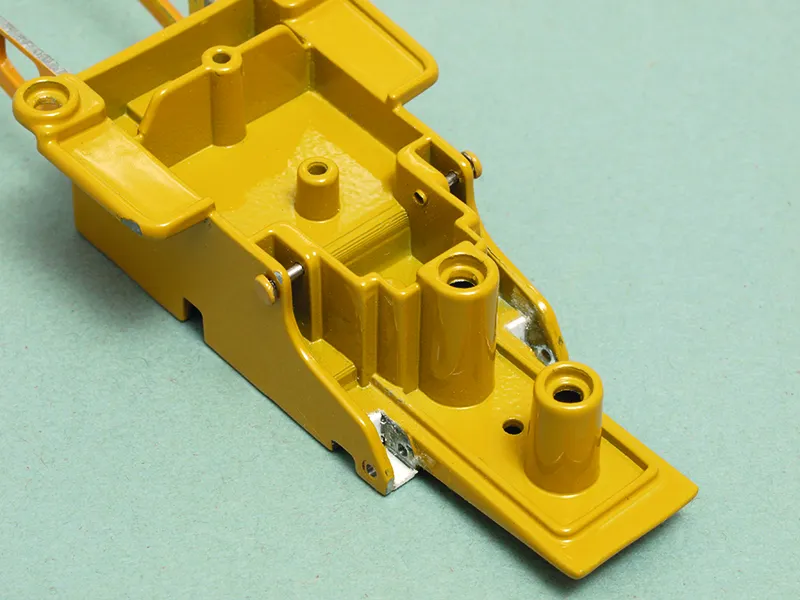
On the Liebherr Welding Dozer, the front part of the platform is connected with the crane to the rear part with four press fit lugs (two right and two left). After they are filed off, these can be expelled with a pin punch thus making it possible to separate the platform. The storage cage for the oxygen bottles is removed using the same method.
All other connections between the dozer and platform are screwed. The auxiliary oil tank is pinned on; the crane and tool box front left are removed by taking out the screws and as is the whole set of additions at the rear.
The Re-building
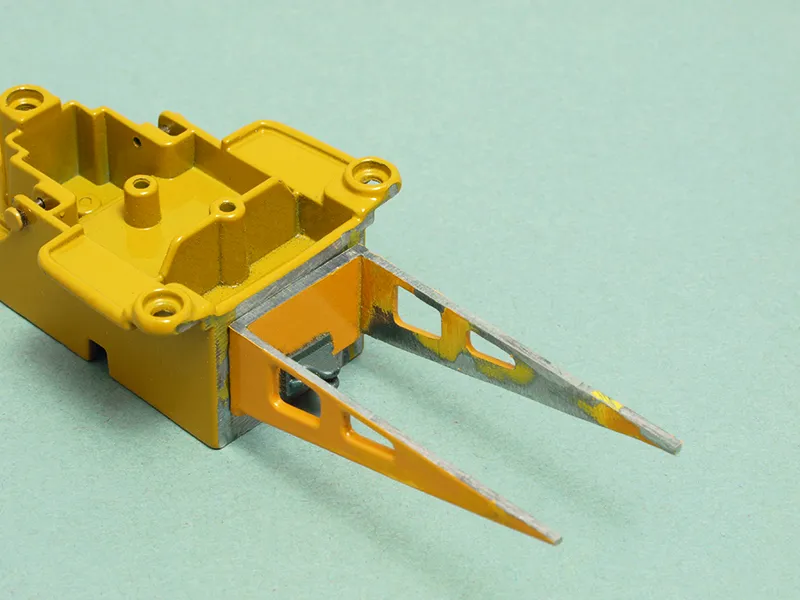
Since the driver’s cabin on the Caterpillar is larger, the platform must be cut in that area using a jeweler’s saw. The opening in the platform has to be enlarged for the bigger Cat driver’s cabin according to picture 3.
The opening has to be enlarged at the rear edge and sides up to the third black line. The opening in the platform should be large enough that the doors of the cabin can still open and there is enough room between platform and tracks that they move without catching.
Next, the two rear brackets of the pushing frame on the dozer have to be enlarged to the point at which the lower carrying frame of the front platform from the Welder fits. The altered carrying part with ledge for the front platform according to picture 4.
Unfortunately, the screw holes at the platform and those on the dozer do not match. We use a 1 mm ABS strip to fabricate a ledge for the lower part of the carrying frame for the front platform (picture3). For optical reasons, the four screw holes at the support brackets can be filled with a 3 x 2 piece of tube (? outer x ? inner). The two “half-timber” trusses have to be stripped of all attachments and shortened by a couple of millimetres (see picture 2).
The trusses at the underside of the rear platform now have to be attached in such a way that the two “half-timber” brackets now sit smoothly on their new positions. Both parts of the platforms without their additions can now be joined temporarily. The carrying structure of the front platform can now be placed on the ledge designed for this purpose and the rear part of the platform needs to shimmed until it is horizontal. In this position the two “half-timber” trusses can now be glued to the rear of the dozer (see picture 2).
Before gluing the two platform pieces together, the right opening where the hydraulic lines of the cranes are fed through, should be slightly enlarged. The fire extinguisher mounted at the front left is a detail part from the model trucking sector. The finished platform should now rest on the ledge and “half-timber” trusses completely horizontal. Picture 5 shows the four sub-assemblies before test mounting. The platform still needs a trip to the spray booth.
To be continued...